Poster Preparation
A practical guide to creating a clear, readable poster for the 42nd Annual MeetingUse the full board, prioritize the science, and make every element easy to read from a distance.
Plan the canvas
Build for visibility
The usable area is wide and shallow. Use a strong horizontal reading path, keep the title prominent, and leave enough breathing room between columns.
Important: The diagram is a layout example—not a required poster template.
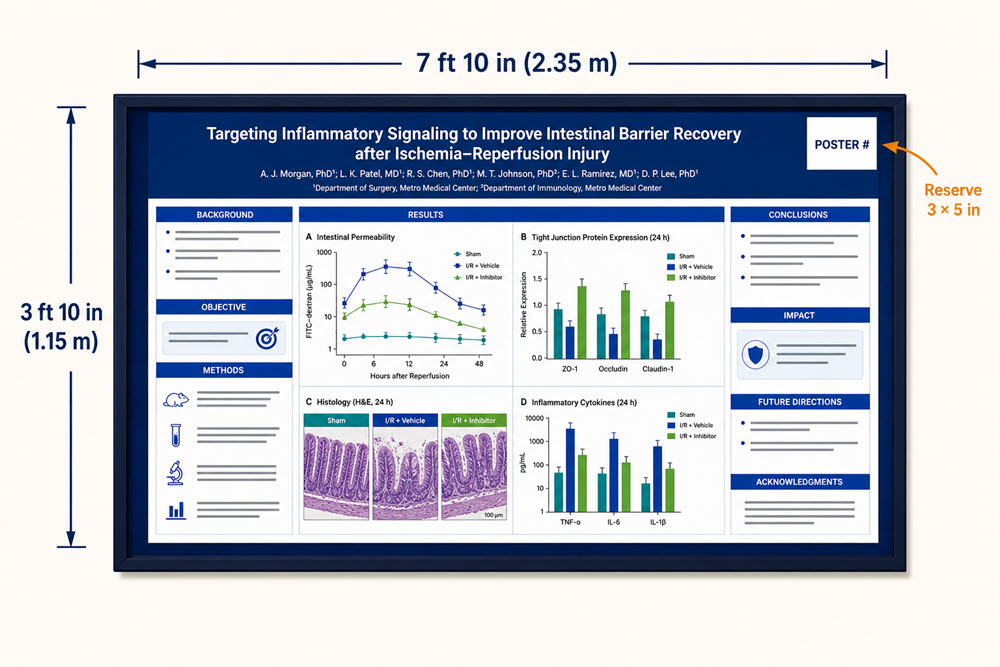
Board Size
7 ft 10 in × 3 ft 10 in
Equivalent to 2.35 m × 1.15 m. Plan a horizontal display that uses the whole board.
save this space
3 × 5 in
Keep the upper-right corner clear so the assigned poster number can be displayed.
Print and Bring
50 handouts
Prepare a single-sheet summary. Two-sided printing is encouraged.
Recommended lettering sizes
Keep the hierarchy simple and consistent throughout the poster.
Title
1.5 in minimum
Place author names and institutions directly beneath the title.
Headings
About 1 in
Use clear section labels to help readers scan the story quickly.
Body text
0.375 in min
Double-space the text and maintain 1-inch margins.
Figures, photos & handouts
Figures & photographs
- Charts, drawings and illustrations: 11 × 14 in recommended.
- Photographs: at least 8 × 10 in.
- Use short, informative legends.
- Choose matte-finish photographs to reduce glare.
- A colored paper or fabric background can improve visibility.
Handout checklist
- Bring 50 copies of a single-sheet summary.
- Two-sided printing is encouraged.
- Include the poster number, title and authors.
- Keep the most useful takeaways easy to find.
- Board-mounted trays will be provided.
Before you travel
Check every label at viewing distance, confirm the number space is clear, and pack your handouts separately for easy setup.